Line-Following Robot For 7-8 Year Olds
Your child draws a line on paper. The robot follows it perfectly, like magic. Except it's not magic, it's a light sensor. And your 8-year-old can build it.

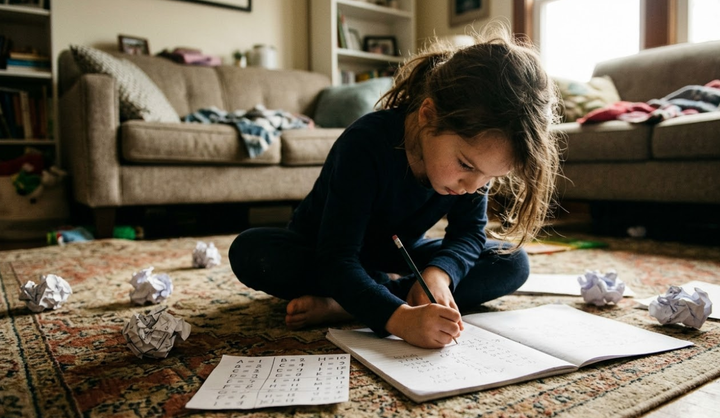
Your child draws a black line on a piece of paper with a marker. A small robot follows it, tracing every curve like it can see the ink. Your child's face does the thing, that mixture of disbelief and immediate scheming, and within thirty seconds they're already asking what happens if the line goes in a circle.
This is a line-following robot, and it's one of the best first robotics projects for a child who wants to build something that actually does something. No pre-loaded routines. No app telling them what to make. They draw a path, they build a machine that follows it, and when it goes wrong, which it will, they figure out why.
What You Need and What It Costs
You need a robotics kit with a light sensor. LEGO Boost works if you already own it, Sphero BOLT if your child leans more toward coding than building, or a basic Arduino sensor kit from Amazon if you're comfortable with a bit more setup. You also need black electrical tape or a thick black marker, white paper or a light-coloured floor, and somewhere between thirty and sixty minutes, closer to sixty the first time, because troubleshooting is where the actual learning happens. Cost ranges from around £30 for a basic sensor kit to £130 or more for LEGO Boost, and if your child already has a compatible kit gathering dust on a shelf, this project is essentially free.
How It Works
The principle is simple enough that you can explain it in one sentence: the robot has a light sensor on its underside, light surfaces bounce more light back than dark ones, and the robot uses that difference to know whether it's on the line or off it. When it detects dark, it drives forward. When it detects light, it turns until it finds the dark again. That's it. Your child doesn't need to understand the physics of light reflection to get started. They just need to see it work once, and then they'll want to make the line harder.
The Build
Building it takes four steps. First, your child assembles a basic wheeled robot from whatever kit you're using. Most kits have instructions for a simple two-wheeled base, and that's all you need. Second, they mount the light sensor on the front underside, pointing down toward the floor. It needs to sit close enough to read the surface but not so low that it drags. Third comes the programming, which in most block-based environments amounts to two instructions: when the sensor sees dark, move forward; when it sees light, turn right. That's a genuine if-then statement, and your child just wrote it without anyone calling it that. Fourth, they lay down a path, black tape on a white floor is cleanest, though a thick marker line on poster board works too, and set the robot loose.
Before You Start
It almost certainly won't work first time. This is not a flaw in the project; it's the project. The robot might ignore the line entirely, which usually means the sensor is mounted too high. It might spin in circles, which means the turn is too aggressive and needs softening in the code. It might follow the line beautifully for thirty centimetres and then veer off into the skirting board, which means the line is too thin or too faint. Each of these failures has a specific, findable cause, and the moment your child fixes one and watches the robot recover is worth more than a dozen tutorials.
Where It Goes Next
Once the basic loop is running, the challenges write themselves. Sharper turns. Loops. Intersections where the robot has to pick a direction. Time trials to see how fast they can push it without losing the line. Adding a second sensor so the robot follows the edge of the line instead of the centre, which is a genuine step up in logic. A child who started the afternoon drawing a straight line with electrical tape can end it designing an obstacle course and arguing with a sibling about whose route is harder. That progression happens naturally, without a curriculum.
What They're Actually Learning
What your child is actually absorbing here is sensor-based decision-making, the same principle that keeps a warehouse robot on its delivery route or a self-driving car inside lane markings. They're learning that small adjustments to sensor height or turn speed change everything, which is calibration. They're learning that the first attempt fails and the fifth attempt works, which is iteration. None of this needs to be pointed out to them. If you find yourself delivering a lecture about real-world engineering applications while your child is trying to make the robot do a figure of eight, stop talking.
Who This Is For
The sweet spot is seven to ten. A confident, patient eight-year-old with some building experience can do most of this independently after the initial setup. A six-year-old will need you beside them for the programming and troubleshooting, and you should be honest with yourself about whether you have the patience for that on a Saturday morning. A child who just wants the robot to work and gets angry when it doesn't is going to have a bad time, this project is all about the not-working part. But a child who sees a misbehaving robot and says "why is it doing that?" instead of throwing the marker across the room will be completely absorbed for an hour or more.
Expect forty-five minutes to first success, including at least one moment where you're both staring at the robot wondering why it's doing something neither of you asked it to do. That moment, for what it's worth, is the best part.